Showing posts with label Recipes. Show all posts

Tuesday, February 4, 2014

Green Muffins

The past few days if I mention I'm going to make dinner, Parker follows me out asking to help. Although there hasn't been many things he is able to help with lately, I hate turning down his offers to come out and be of assistance. I want our kids to learn how to cook and to enjoy trying new foods. So I decided that whenever possible, meaning when I have food prep that's kid friendly, I'm going to let Parker help even if it takes a little longer to get the meal ready.

Since tonight's dinner is already in the crockpot I asked Parker if he'd like to help me bake something this morning while Elise was napping. I had copied a recipe from Pinterest for green muffins--what little boy wouldn't like that?! When I told him what we were making, he was SO excited to get started! Did I mention green happens to be his favorite color?  :)

Here is the recipe I used. The bright green color is from spinach! There's a little sugar and some applesauce in the recipe to give them a slightly sweet taste.


I wasn't sure what Parker would think when he saw me putting big leaves into the blender, but I told him they would turn the muffins green and he didn't seem to mind... actually, he added them in like it was just a normal ingredient.

We scooped the batter into a mini muffin pan and Parker pulled up a chair to watch them bake. A few minutes later we had nice puffy green muffins! He couldn't wait to try them. I'm sure he would have grabbed one hot off the pan if I hadn't been there to keep his little fingers back.


We had lunch a few minutes later so along with our sandwiches I gave both kids a couple muffins. Parker loved them. He ate four (or was it five?) at lunchtime. Elise picked hers up and looked at it for a minute before taking a bite. She ate hers a little more slowly, so I'm not sure if she loves them (although she seems pretty happy with it in the picture).

I tried a couple, too.  ....can't say I love them...  but they're okay. And if it's a way to get more veggies into Parker, then I'm totally fine with making them again!  :)


Tuesday, July 10, 2012

Meatballs

I made spaghetti for dinner tonight and thought I'd share a little something I learned about making meatballs.  :) The recipe says to bake them on a cookie sheet and turn them while they're cooking. I've done it this way, but they still get flat and a little overcooked on each side you put them on. Not to mention they're a bit greasy.


So last time I made meatballs I tried a different way to cook them. I set a wire cooling rack on top of the cookie sheet and placed the raw meatballs on the rack.


That way worked SO much better! The heat can circulate all around them so they don't need to be turned, meaning they came out round and evenly cooked.


And I like that the meatballs aren't sitting/cooking in a puddle of grease--it all drips down into pan. Look at what was left on the cookie sheet after I took the rack off... disgusting, right?


Here's the meatball recipe I normally use. It's from Taste of Home's Quick Cooking magazine. The recipe makes between 30-40 meatballs, depending on how big you like them. And, of course, I recommend MY cooking method ahead of hers.   :)


Make-Ahead Meatballs

1 egg
1/2 cup dry bread crumbs
2 Tbsp. finely chopped onion
3/4 tsp. salt
1/2 tsp. worcestershire sauce
1 lb. ground beef

Combine all ingredients and mix thoroughly. Shape meat into 1-inch balls and place in a single layer on an ungreased baking pan. Bake at 400 degrees for 10-15 minutes or until no longer pink, turning often while cooking. Drain on paper towels.   


So that's my little cooking tip for the day! Hope it was helpful to somebody reading!


This last picture was one I took for fun while making dinner. The larger, regular sized bell pepper was from the store and the little one next to it was picked from our garden. Isn't it cute?  :)

Sunday, June 10, 2012

Fruit Tarts

Today was a big day for our youth Sunday school class. It was "Promotion Sunday," the week they honored the high school grads and also recognized the younger ones moving up into either middle school or high school. As a result, we had a slightly larger class than usual. I volunteered to bring sweets, thinking something fruity might be good for a hot summer day.
I asked Kyle what he thought would be better....a cherry danish-type dessert or fruit tarts. I wasn't surprised when he chose the tarts.  :)  Fruit pizza is one of our favorite desserts. It has a soft cookie crust, a layer of sweetened cream cheese and then fruit arranged on top. Super yummy! I got the recipe from my Aunt and everyone loves it. But I thought it might be a little messy to take for the class since it requires plates and forks to eat it. And a knife to cut it, and a lifter to serve it, etc., etc...  which is why I decided on tarts!
Well, I was away most of Saturday and didn't feel like spending all evening in the kitchen making and cutting out cookie dough for tarts. So I cheated this time and tried using refrigerated pie crusts. Here's how I made the tarts:

Fruit Tarts

2 boxes refrigerated pie crust
2 pkg. (8 oz. each) cream cheese, softened
1/2 cup powdered sugar
1/2 tsp. vanilla
small tub of coolwhip
assorted fruit, cut into small chunks or slices. I used strawberries, kiwi, blueberries, blackberries, mandarin oranges and grapes.

1) Unroll the pie dough and use a cookie cutter to cut out circles. Press dough into tart pans and prick well with a fork. Bake according to package directions. Cool completely.


2) Beat cream cheese with powdered sugar and vanilla until smooth. Fold in about half the tub of coolwhip (I didn't measure) mixing until evenly combined.


3) Spoon a small amount of the cream cheese filling into each tart shell. I used a scoop to quickly get the same amount in each one. Spread slightly. Top each tart with a few different kinds of fruit. Store tarts in the fridge.


That's it! Aren't they pretty? I love all the bright colors of the fruit. I got about 30 tarts, but if I had re-rolled the pie dough scraps I would have gotten a few more.

Before giving them out to the class I wanted to know how they tasted so I tried one. Hmm... guess it was okay, but not as good as fruit pizza. I asked Kyle afterwards what he thought of them and he agreed. He said they were fine, but the pie dough was definitely not as good as the sweet cookie crust I usually make. So these would be better if made with some type of shortbread or sugar cookie tart shell. I'll have to try that next time!

Friday, June 1, 2012

Baked Zucchini

Thanks to all the meals in our freezer, I didn't have to make dinner tonight! I had thawed out a lasagne, so all I had to do was put it in the oven and sit and wait.  :)
Since I had plenty of time, I decided to make a batch of biscuits to go with dinner. Once those were done I got out a zucchini to cook as another side. I've chopped it up for spaghetti sauce or steamed it along with other veggies but I don't usually cook it plain....I wasn't sure what to do with it. Seemed like a good time to experiment!

I got out a few simple ingredients and began. Here's what I used...


1/4 cup dry bread crumbs
1-1/4 tsp. ranch dressing mix
1/2 cup milk
1 small zucchini


Stir together the bread crumbs and ranch mix;
set aside. Cut the zucchini into 1/4" slices.


Dip the slices into the milk, then into the bread crumbs, giving each piece a light coating.


Place onto a cookie sheet and bake at 350 degrees for 15 minutes, turning halfway through, until the breading is lightly browned. Done!


Parker doesn't always like plain vegetables, but he tried one of these and then proceeded to eat about half of the plate! :)

Saturday, February 25, 2012

Chicken Enchiladas

I love enchiladas. But they have to be good enchiladas. I've tried a few recipes from random cookbooks/magazines but didn't love any of them enough to add them on our regular meal list. Finally I went to allrecipes.com and found this one. I don't know why I didn't check there sooner--I look up recipes on that site all the time! And I love that so many people rate and review what they make because it helps me narrow down the choices when I'm looking for a particular recipe. I usually only make ones that have a four or five star rating, and they've turned out great every time!

Anyway, these enchiladas looked really good from the picture AND they had a good rating, so I had to try them. It took a little more prep work than other ones I've tried, but SO worth it! I loved how they turned out and Kyle did, too, saying they were a lot better than the other kinds we've had. :) Even Parker was impressed--he ate half of one all by himself!

Angela's Awesome Enchiladas
from allrecipes.com

Ingredients:

2 pounds skinless, boneless chicken breast meat - cut into chunks
1 (10.75 ounce) can condensed cream of chicken soup
1 1/4 cups sour cream
1/4 teaspoon chili powder
1 tablespoon butter
1 small onion, chopped
1 (4 ounce) can chopped green chilies, drained
1 (1.25 ounce) package mild taco seasoning mix
1 bunch green onions, chopped, divided
1 cup water
1 teaspoon lime juice
1/2 teaspoon onion powder
1/2 teaspoon garlic powder
5 (12 inch) flour tortillas
3 cups Cheddar cheese, shredded, divided
1 (10 ounce) can enchilada sauce
1 (6 ounce) can sliced black olives
Directions

Place the chicken in a large pot and add water to cover. Bring to a boil over high heat, then reduce the heat to medium-low, cover, and simmer until the chicken pieces are no longer pink, about 10 minutes. Shred chicken by placing two forks back to back and pulling meat apart. Set the shredded chicken aside. Meanwhile, combine the cream of chicken soup, sour cream, and chili powder in a saucepan. Bring to a simmer over low heat, stirring occasionally, then turn off the heat and cover to keep warm.
Heat the butter in a skillet over medium heat. Stir in the onion; cook and stir until the onion has softened and turned translucent, about 5 minutes. Add the shredded chicken, chopped green chilies, taco seasoning, half of the bunch of chopped green onion, and water. Allow to simmer for 10 minutes. Stir in the lime juice, onion powder, and garlic powder; simmer for an additional 10 minutes.
Preheat an oven to 350 degrees F (175 degrees C). Stir 1 cup of the soup mixture into the skillet with the chicken mixture. Spread the remaining soup mixture on the bottom of a 9x13 inch baking dish.
Fill each tortilla with chicken mixture. Sprinkle Cheddar cheese over the chicken filling before folding the tortillas, reserving half of the shredded cheese for topping the enchiladas. Fold tortillas over the filling and place seam-side down in the prepared pan.
Pour enchilada sauce evenly over the enchiladas. Cover with the remaining 1 1/2 cups of Cheddar cheese. Sprinkle the reserved chopped green onions and the sliced olives on top of the cheese. Bake in the preheated oven until filling is heated through and the cheese is melted and bubbling, about 25 minutes.

I liked that the chicken filling was re-cooked with seasoning so it had a lot of flavor. And I liked the sauce. It was a good mix of creamy and cheesy. MMmmmmmm.... :) The only changes I made were baking the chicken rather than boiling it (375 degrees for about 45 minutes) and I didn't use the yellow onion.

I used regular large tortillas for mine and I got nine good-sized enchiladas. I decided to freeze a couple to see how good they are thawed and warmed up. Still haven't tried the frozen ones yet, but if they taste good I'll be making some of these for freezer meals!
I tried to get a few pics, but I forgot to get one of the finished meal until after we had eaten! Here's what was left...

So for anyone looking for a good recipe, thought I'd share one of our new favorites!

Wednesday, October 19, 2011

Rocky Road Bars

We were invited to a friend's home for dinner yesterday and, although they said we didn't have to bring anything, I still wanted to take a little something as a thank-you. So I got out my dessert recipe book and was about to make a batch of cookies. Only one problem.... I had no brown sugar. Okay, I could just make another kind instead. But I looked through several other recipes and I was missing an ingredient for everything I wanted to make! Arrghh!
I put my book away and looked in the pantry to see what I DID have....aside from the usual flour, sugar, baking soda, etc., I had some graham crackers, lots of marshmallows, peanut butter and a few chocolate chips. Rocky road bars! My parents used to make them for us as kids. They were thick chocolate squares with little colored marshmallows. I don't have a recipe for it and I was a little short on chocolate, so I made my own version:


Rocky Road Bars

3 graham crackers
1 Tbsp. butter
1/3 cup milk chocolate chips
1/3 cup peanut butter
2 cups mini marshmallows


Break the crackers apart and line the bottom of a 9x5 loaf pan. Set aside. Crush the remaining crackers into coarse crumbs.
Melt the butter in a small pot, then add chocolate chips and stir until melted. Mix in peanut butter until smooth. Stir in marshmallows until coated, then spread over the wafers in the loaf pan. Sprinkle with remaining crumbs and chill until firm. Cut into 8-10 squares.


These weren't as thick and chocolately as the ones I remember having, but using the ingredients I had, they turned out pretty good--definitely sweet enough to satisfy a chocolate craving! And I think I liked them better with a little peanut butter mixed in.

Sunday, August 21, 2011

Pickles

I've been trying to post in the middle of the week, so I'm not sure if Sunday would be considered really late, or really early... :) We'll just say it's a couple days late.
I made several new recipes this week and I took pictures, however, I took them on my phone and when I tried to email them to my computer, they didn't all go through. I only got one and, unfortunately, I deleted them before I could re-send them. *Sigh.*
The first thing I made was rice pudding! I tried it when I was younger and for some reason I loved it--guess it's kind of a cozy, comfort food thing for me...although that said, I can't eat it all the time. I found a recipe on www.allrecipes.com and made a few little tweaks to it and it turned out pretty good. Lots of cinnamon and raisins--yum! :)
The second one I made was baked potato soup. I LOVE the kind served at Outback, so I keep looking up recipes for it, hoping to find something even slightly close to that. The one I tried was okay... I can't remember the blog I found it on, but I wrote down the recipe, so it's one I'll probably make again. The base is mostly broth, then you stir in a little milk and sour cream at the end (the first potato soup recipe I tried had more milk and cheese, so it ended up way too rich...hard to eat very much at a time). This one was very filling, but was easier on the stomach! I had a nice picture of a bowl of the soup, topped with bacon, cheese and green onions, but...you'll have to just imagine how good it looked! :)

And the last thing I tried this week was homemade pickles! I love pickles. My Mom cans her own every year and she has a super easy recipe that doesn't have to be processed, so I wanted to start with that. She usually pickles cucumbers and carrots (I know, pickled carrots sound weird, right? But they're really good!) but this year she also added green beans to the mix! I haven't tried pickled beans, but I'm sure they'd be good. Maybe.
Anyway, I picked up all the ingredients except cucumbers. I don't know if I waited too long in the season for little ones, of if nobody sells them that small but I couldn't find any. I like pickled carrots just as much so I picked up a 5 lb. bag of carrots and I eagerly awaited Parker's next nap. :) Once he was snug in his bed I went to work. I peeled and cut the carrots, then packed them into the jars. I wasn't sure how many jars it would take, so I did three quart-sized ones and two pint-sized. I alternated the carrot sticks with a few sprigs of dill, then once they were full I poured the brine over them to fill the jars. I had a little more of the brine left over, enough for another jar, but I had already used up all the dill and most of the carrots, so I just poured out the extra. Finally, the jars were covered and sealed and sitting in my cupboard for the next four weeks until I can open one and try them! Yum! :) Since this is my Mom's recipe, I can post it on here!

Dill Pickles
1 qt. vinegar
2 qt. water
3/4 cup pickling salt (course salt without iodide)
1/2 cup sugar
lots of small cucumbers or carrot sticks
dill weed

Wash and sterilize jar and lids. Wash vegetables and pack into jars, alternating layers of veggies with sprigs of dill. Set aside.
Combine vinegar and water; boil for 5 minutes. Stir in salt and sugar and boil for 1 minute longer. Pour over vegetables, filling jars almost to the top. Cover and seal. Allow pickles to set for 4 weeks before opening. Makes 5 quart-sized jars.

Once again, the pictures I took did not go through, except for one of the final product...

Saturday, August 6, 2011

Baked Ziti

Whew--almost didn't get my weekly post done! :) Seems like the past few days have been busy and every time I sit down to update it Parker wakes up, or it's time to start dinner, or ...etc., etc. But here it is! This week I tried another new recipe--Baked Ziti! Why baked ziti, you may or may not be asking? Well, I was talking to a friend recently about making some meals to freeze, so one night I started looking up recipes/meals that freeze well, and a blog popped up with this. It looked really good so I thought I'd try it and see how it turned out. Most ziti recipes I find use a jar of pre-made sauce and they're not my favorite but this one is all from scratch. Here's the website where I found the recipe: www.annies-eats.net/2009/07/02/baked-ziti/. I think it's actually from Cook's Illustrated.

Baked Ziti
1 lb. cottage cheese
2 large eggs, lightly beaten
1 1/2 cups parmesan cheese, divided
table salt
1 lb. ziti
1 Tbsp. olive oil
20 oz. turkey sausage
1/2 cup yellow onion, finely chopped
5 med. garlic cloves, minced or pressed
1 can (28 oz.) tomato sauce
1 can (14 oz.) diced tomatoes
1 tsp. dried oregano
1/2 cup + 2 Tbsp. chopped fresh basil, divided
1 tsp. sugar
3/4 tsp. cornstarch
1 cup heavy cream OR whole milk
8 oz. mozzarella cheese, cut into 1/4" cubes

Preheat oven to 350 degrees. Whisk together cottage cheese, eggs and 1 cup parmesan; set aside. Boil a pot of water. Stir in a Tbsp. salt and the pasta. Cook until pasta softens, but is not cooked through, about 5-7 minutes. Drain and leave in colander.
Heat olive oil over medium heat. Add sausage and cook until almost browned. Add onion and garlic and cook until onion is soft and the meat is thoroughly brown. Stir in tomato sauce, tomatoes and oregano; simmer until thickened, about 10 minutes. Remove from heat and stir in 1/2 cup chopped basil and sugar. Season with salt and pepper, if desired.
Stir together milk and cornstarch in a small pot. Cook until thickened, about 3-4 minutes. Remove from heat; stir into cottage cheese mixture. Add 1 1/2 cups of the tomato sauce mixture and 3/4 cup mozzarella cheese. Add pasta and toss to coat thoroughly. Pour pasta into a 9x13 pan and spread remaining tomato sauce on top. Sprinkle with remaining parmesan and mozzarella.
Cover pan tightly with foil and bake 30 minutes. Remove foil and bake an additional 30 minutes, until cheese is bubbly and begins to brown. Let stand for a few minutes before serving. Sprinkle with remaining 2 Tbsp. basil.


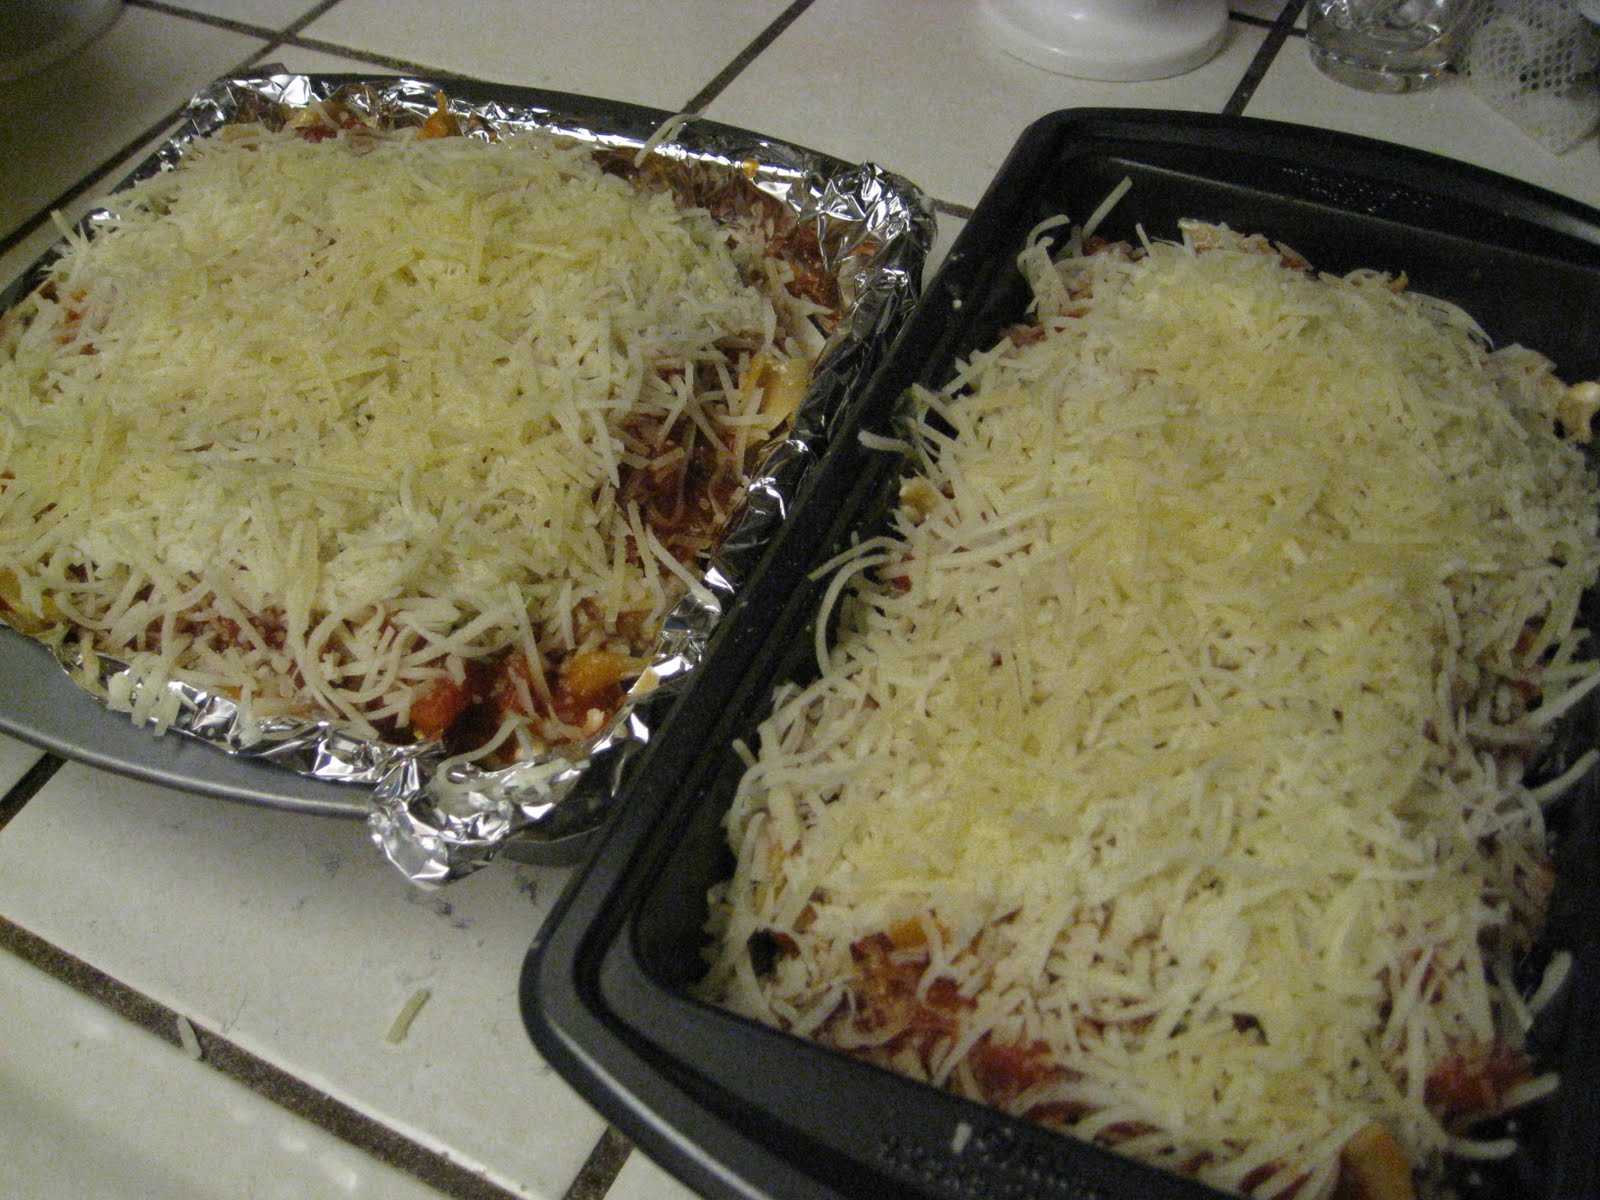
I only made a few little changes... I decided to make it without meat and it was still very filling! I used egg noodles rather than ziti, and I used whole milk, which didn't really thicken with the cornstarch but it seemed to work fine anyway. And rather than make a 9x13 pan, which is way too much for the two of us, I put it into two smaller pans and froze one of them. I wanted to see how it tastes after being frozen/thawed. Other than that I followed the original recipe and it was pretty good. I love the fresh garlic and basil--makes a big difference in taste! :)


I'd like to make some other meals for the freezer, too. It's wonderful when you can have a home-cooked meal already made and ready to put in the oven after a long day! :)

Wednesday, July 27, 2011

In a Jam

This week's new recipe was homemade jam! Mom always makes freezer strawberry jam and says it's super easy. It takes only 4 ingredients and not a lot of time to put together so yesterday I thought I'd try it. Maybe Kyle's PB & J sandwiches will taste a little better with fresh berries! :)

I used one of the freezer jam recipes that came inside the box of fruit pectin. The recipe is here on the Kraft website: www.kraftrecipes.com/recipes/30-minutes-homemade-surejell-50137.aspx They have recipes for all kinds of fruit, but I went with plain strawberry. I bought a big container of berries last weekend thinking I'd cut them up to have with dinner a couple nights, or make strawberry shortcake or something... We didn't end up eating very many, so I thought I'd use them up before they went bad! Turns out I had just enough good ones left to get the one quart I needed!

After cutting out the stems and rinsing them, they were mashed. My potato masher isn't good for mashing smaller stuff and it was still way too chunky. So I ended up chopping the berries, too, to get smaller pieces (although I think I WOULD leave it a little more chunky next time).

The next step is to stir in the sugar.
Yes, you're seeing that correctly--there is twice as much sugar as there is mashed berries. Yikes! Makes me glad I don't eat jam too often! I knew jam/jelly was sweet, but.....wow.
So, the sugar was mixed in and then it had to sit for a few minutes. While the sugar and fruit was doing its thing, I cooked the pectin and water. it had to boil, and then be mixed into the fruit.


Last step was pouring it into containers! I had just enough to fill five little containers--aren't they cute?! :)

The hard part is letting it sit for 24 hours! I wanted to try it and make sure it turned out okay. Today for lunch I opened one and spread some on a piece of bread and asked Kyle if he would try it, as he is the main jam connoisseur in our family. He said it was good! It turned out a little more soft and runny that what I wanted so I'm hoping that being in the fridge for a while will help it set more.

I'm going to try making plum/pear jam this week, too, once I get some canning jars! Will post that later, if it turns out. :)

Tuesday, July 19, 2011

A Homemade Dinner

I've been trying to do better at grocery shopping by writing out a weekly menu. That way I can look at the menu, figure out exactly what ingredients I'll need for the week and just make one trip to the store. And it's helpful to know what I'm making so I'm not scroungimg through the cupboard trying to put together random ingredients to come up with something edible for Kyle (which I'm sure he also appreciates!). Not that I couldn't come up with a tasty dish based on canned chilis and baked beans.... :)

So tonight's dinner was spaghetti! I normally buy spaghetti sauce and then add meat and a few veggies to it but I'm getting a little tired of the store-bought kinds. I don't know why I buy it, because it doesn't take any more work to open a couple cans of tomatoes and spices than it does a jar of sauce...? So I decided to make it from scratch today instead. I used a recipe my Mom had which is super easy--mostly ground beef and tomatoes mixed with garlic and a few spices. Once everything was mixed together it had to simmer for a few hours, so I figured I would have time to make some bread, too. I was getting low on flour, so I made half a batch of dough (just one loaf instead of the two it normally makes) and I used some whole wheat flour instead of all white, which I've never tried before. I put that in the oven to rise for an hour and, having plenty of time left, decided to make some cookies for dessert!

One of Kyle's favorites is chocolate peanut butter no-bake cookies so I made those. Perfect for today--not a lot of ingredients and I wouldn't need the oven! There wasn't much peanut butter left, so I only made half a batch but it still made enough to last a few days. This is the recipe I use:


No Bake Cookies
2 cups sugar
1/2 cup butter
4 Tbsp. cocoa
1/2 cup milk
pinch of salt
1 cup peanut butter
3 cups quick-cooking oats
1/2 tsp. vanilla

Combine the first five ingredients in a large pot and bring to a boil. Let mixture boil for two minutes. Remove from heat and add peanut butter, oats and vanilla; mix well. Spoon mounds onto waxed paper and let cool. That's it!

I considered making the noodles, too, but I was out of flour. I'll have to try that another time. :) I think the spaghetti sauce, bread and cookies were enough for today!

The sauce and bread turned out pretty good! Making meals from scratch is so much better than buying stuff pre-made!


But I didn't do it all myself. As always, I had my little helper with me while I was cooking!