Thursday, February 28, 2013

Baby Shoes

I finally got around to making a little pair of shoes for Elise! I look at the tiny shoes for sale at Babies R'Us and have been tempted to buy some but, adorable as they are, I just can't do it. Almost $20 for shoes that will fit for maybe a couple months? No thanks!

But I do have several baby shoe patterns and piles of fabric so I'm going to make her a few pairs instead. And let's face it...homemade ones seem a lot more comfy for her little feet than the stiff shoes in the store. That's what I tell myself, anyway...   :)

I found a small chunk of black corduroy and used black flannel for the inside lining. I wanted to make Elise a pair of Mary Jane-type shoes to start with. The only problem was I didn't have a pattern for those in her size. A different pattern looked like it would work, so I found the 3-6 month size and tweaked it a little to make the top a different shape. Etsy is my new favorite place to look at patterns. I've found some really cute baby patterns that are inexpensive and super easy to make. And baby shoes are great--they're so small they only take a few minutes to sew!

So my new 'design' worked out okay. I couldn't decide how I wanted the straps to look so I ended up leaving them off and tried something different. Mom gave me a huge bag of buttons last summer and there were a few black flowered ones that were the perfect size. I sewed a button on both sides of each shoe, then used black elastic to stretch across as the strap.


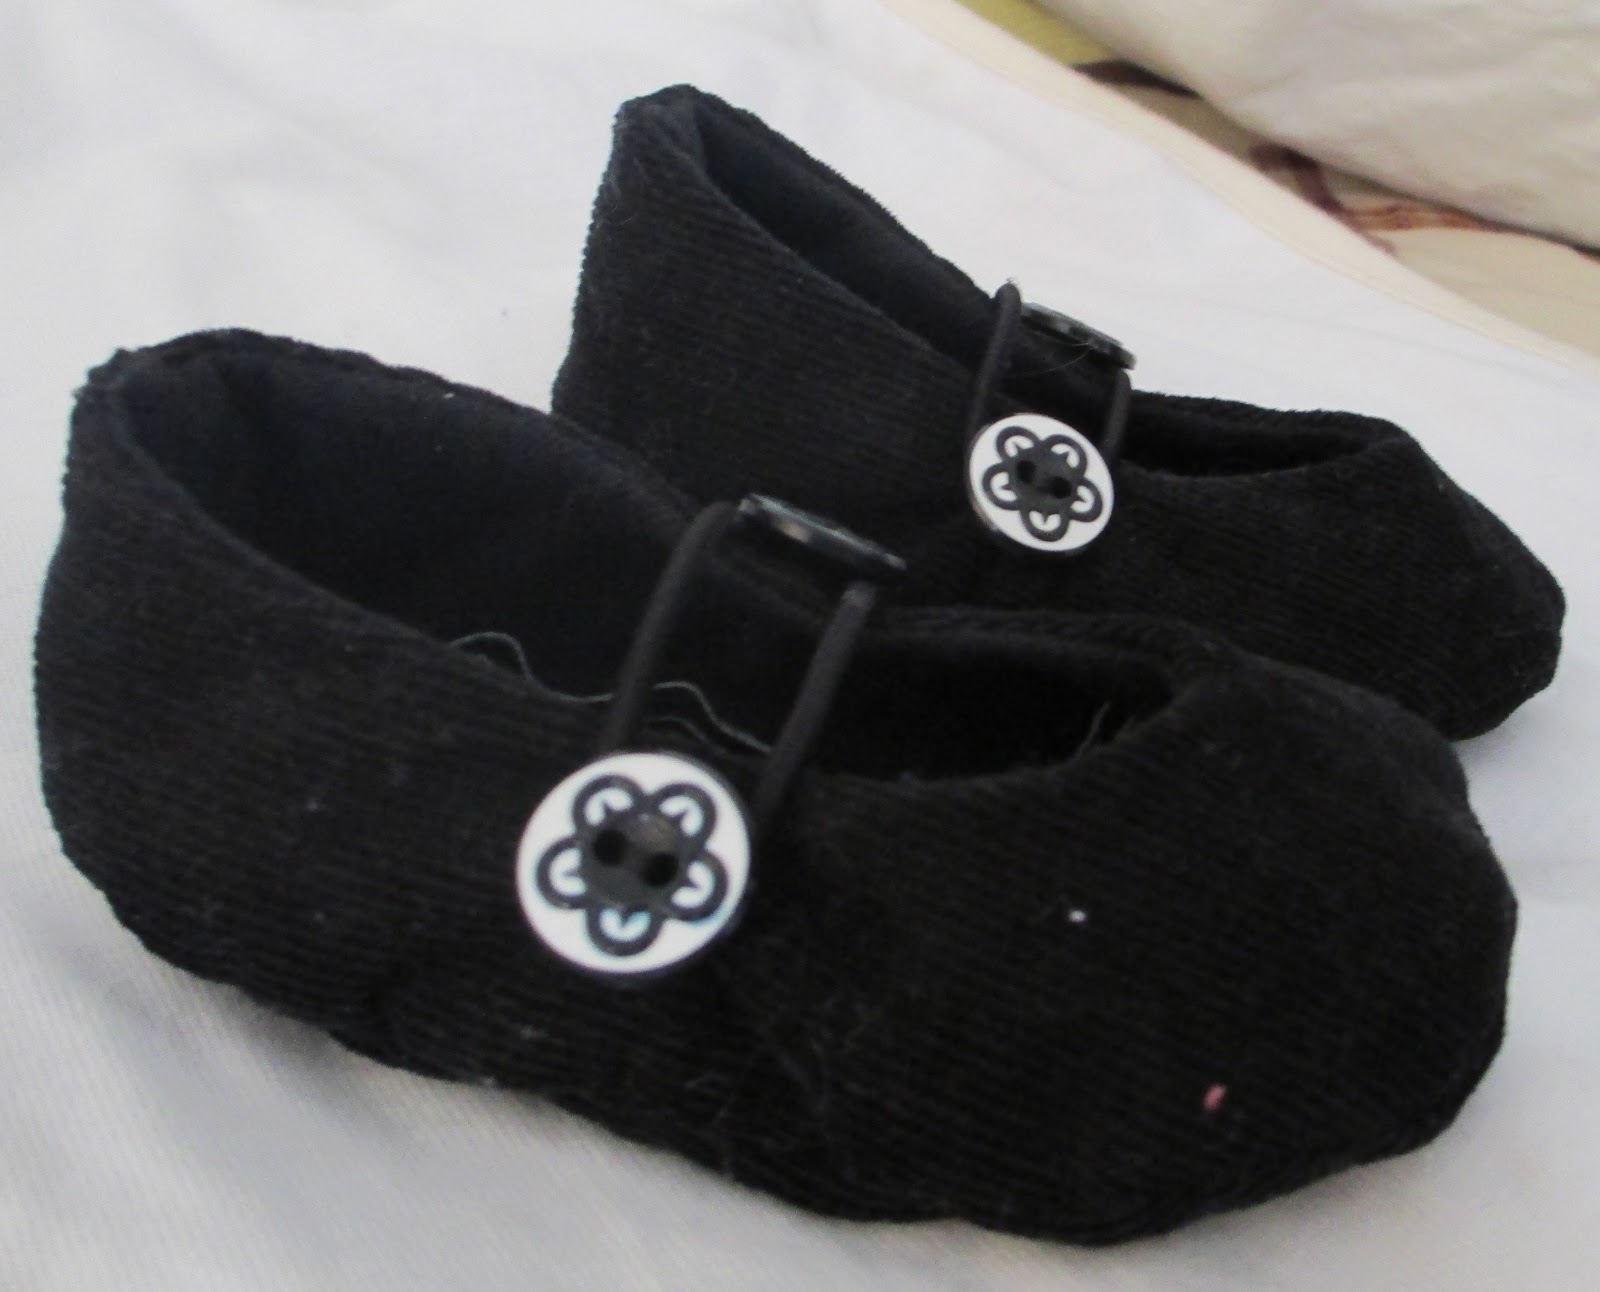
Done! And they actually fit Elise's feet really well. Although when I tried to get a picture of her wearing them she started curling her toes so they look a little awkward here...


I want to make her a few more pairs--different styles and colors for this summer. Will post more pics later!

Sunday, February 24, 2013

Cookies!

Looking for simple entertainment? Bake with a toddler! :)

I couldn't decide what to do with Parker last week so I let him get his little hands into some cookie dough! I mixed up a batch of sugar cookie dough one morning and put it in the fridge for a while to chill.

After lunch I pulled it out, along with a rolling pin and a few cookie cutters. I kept them simple, using shapes he would recognize--circle, square, star and heart.

He was so excited to help!

I rolled out a piece of dough on a cutting board and set it in front of him. He needed a bit of help pushing the cutters all the way through, but after making a couple shapes I let him try it on his own.


He was somewhat distraught when I pulled out the first couple cookies, but once I explained that I had to put them on a tray and bake them he went back to work.

His toddler technique was great to watch! Each time I gave him a freshly rolled piece of dough he would cut the first cookie from the middle. Then he would work his way out, either cutting around or overlapping that first one. When I pulled up the cookies to put on the baking pan I was finding some unusual shapes!


At one point I was busy cutting out some cookies and checking the ones in the oven so I wasn't paying much attention to what he was doing. When I looked over, I saw that I hadn't been quick enough at taking out the ones he had cut. So he just kept cutting...and cutting...and cutting!

This poor piece of dough was shredded! I don't know how many times I re-rolled it for him, but I'm pretty sure the cookies turned out a little more, um....chewy than usual.  :)


After they were baked I let him try one and asked him to take one to Daddy. He proudly handed one to Kyle and told him that "Parker made it!"

We had plans to go out that night so the decorating waited until the next afternoon. I mixed up a bowl of icing and got out a couple plastic knives and two kinds of sprinkles--big chunky sprinkles that he could pick up easily. I started icing a few cookies to show him how. The first thing Parker did was pick up a plain star cookie and inform me, while taking a bite, that he needed to eat that one.

I guess he wanted to try one to make sure they were still okay...?

When he finished eating, we were finally ready to start decorating. He put a little glob of icing on a cookie...


then got distracted by the colorful sprinkles and decided to play with them for a while.


I kept asking him to help me decorate the cookies, so he finally picked up his knife again and put another, bigger glob of icing on his cookie. Then he began decorating it, one sprinkle at a time. Yes, we were there for quite a while...


Here is the one he made all by himself!


 Although they took a little longer to make this time, I have to say.... these turned out to be the cutest cookies ever!  :)


Friday, February 8, 2013

No-Mess Painting

I tried another art project with Parker last week. I wanted to let him paint again but it's a little chilly outside and finger paints are too messy for in the house.


The solution?  Bag painting!  :)


Since Valentine's Day is coming up, we made hearts. I cut some hearts from card stock and placed each one inside a small ziplock bag.


Next I poured a few drops of paint into each bag, then sealed and handed them over to Parker. After I showed him how to smear the paint with his finger to 'paint' the heart, I let him take over and sat down to watch.


He was doing a good job!


When I thought he was done with a couple I picked them up to open and he got a little upset.   ...guess he thought I was going to take them away or ruin his work.

So, standing where he could see me, I cut open the bags and lifted out the hearts, being careful not to smear the paint too much. I wanted to keep as many of his little finger strokes/designs as possible!

I placed the hearts on cookie sheets and set them outside to dry.

It took a few hours for them to dry. Just before he got up from his nap I brought them all in and hung them on the wall. He noticed them when he came in later and his whole face lit up.


He was so proud of what he did and told me HE painted them and then asked if we could send some to Grandma and Papa. He was very emphatic that we needed to send TWO hearts, so he picked out the red and purple ones on the left and we put them in the mail yesterday.

So fun! I love that he enjoys making projects. Elise likes it too, apparently. Every time we put her chair in the kitchen she stares at the hearts up on the wall and smiles.


Tuesday, February 5, 2013

Heat Pack

I made a heat pack last week. Not overly exciting, I know, but it's something I've been needing.

When my knee is aching or I have nursing issues the only heat pack we have is a huge one Kyle got that's meant to wrap around his neck and shoulders. Not great for a small area. So I made one. And it's prettier than Kyle's, too.  :)


 The best part is that it only took two supplies--a small bag of rice and a scrap piece of flannel.


I didn't have a specific size in mind... I ended up cutting out two pieces of flannel 12 x 7 inches.


I sewed around three sides, leaving one short end open. I trimmed the corners to prevent too much bulk, then turned it right-side-out and top stitched close to the edge to give the seams a little extra reinforcement.

If I poured all the rice in at once, it would fall to one side like a beanbag. Instead, I made the heat pack with sections. 

I marked and drew lines every 2.25 inches down the length of the pack. I poured 1/4 cup of rice into the bottom of the bag, then stuck a few pins across to hold the rice back while I sewed over the line.

I poured in another 1/4 cup of rice and repeated until the last section was filled. To close the last section I folded in the end of the bag 1/2 inch and top stitched across.


Done!
Isn't it cute? So glad I now have a normal size heat pack for the next time I hurt.  :)